Pexels Step 1. Add the Developer Tab Step 2. Insert a Combo Box Step 3. Edit Properties Step 4. Enable the Combo Box
Step 1. Add the Developer Tab
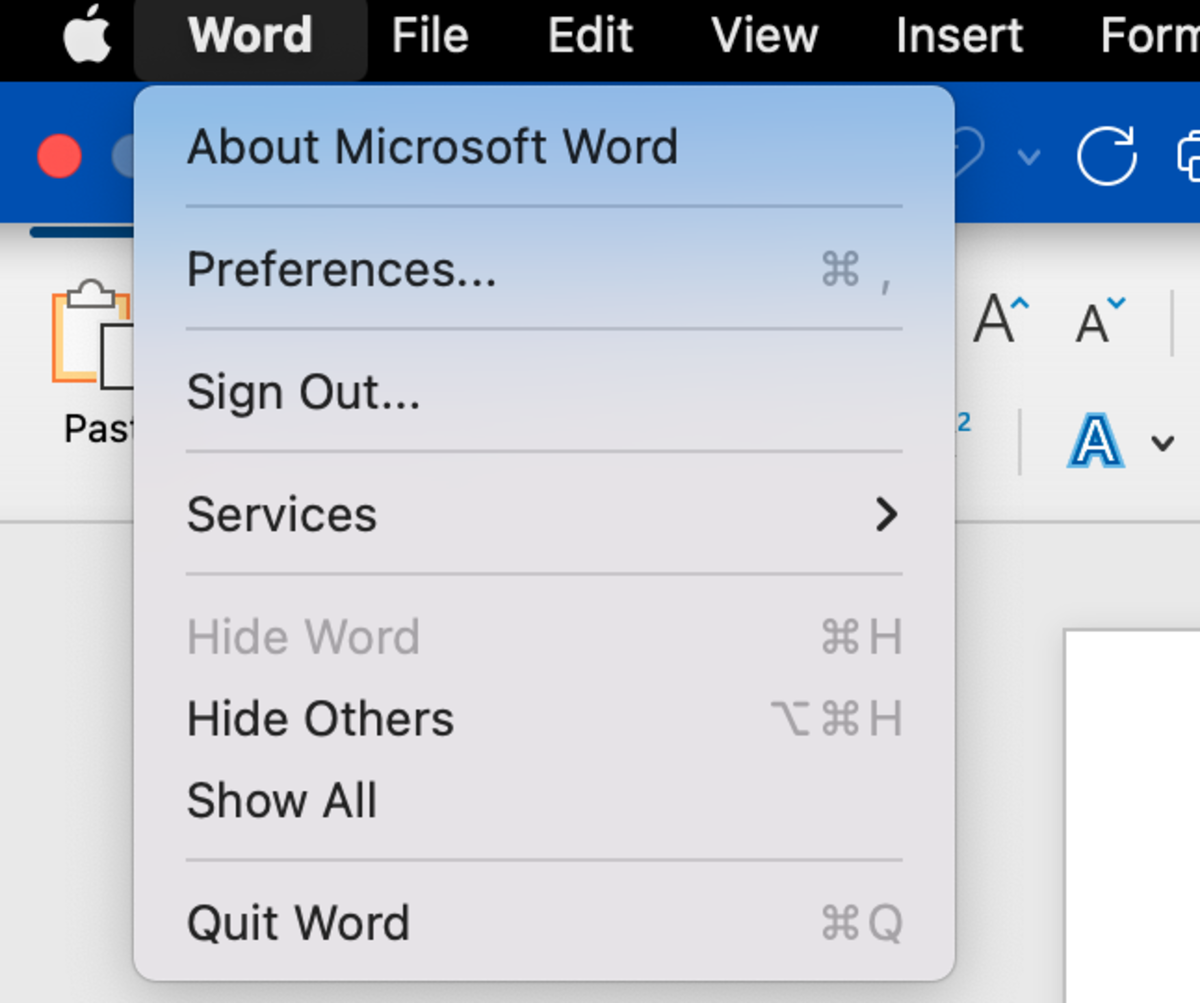
For the combo box option to be visible, you must add the developer tab to the Word ribbon. Click on the Word tab and choose preferences to start this process. Next, choose the ribbon & toolbar option located in the authoring and proofing tools section. The ribbon and toolbar options below will appear. To make the developer tab appear simply check the box beside developer under the main tabs selection and save the change.
Step 2. Insert a Combo Box
Now that the developer tab is visible click into the cell where you would like the combo box to appear, then click the combo box option under the developer tab.
Step 3. Edit Properties
Next, press control while clicking on the combo box to get the menu options to appear. Select the properties option. This is where you can customize and add content to the combo box. To enter data, add data to the item field followed by clicking on a plus button. You also have the option of giving the field a bookmark name. Select OK to submit the changes.
Step 4. Enable the Combo Box
To enable the dropdown, click on the protect form button. The properties will not be visible to edit the combo box in protected mode. Remember to unprotect the document before making changes. This content is accurate and true to the best of the author’s knowledge and is not meant to substitute for formal and individualized advice from a qualified professional. © 2022 Joshua Crowder


